Mixed reality
On this page we will introduce some of the mixed reality features available on Varjo headsets.
These features are available for XR-3 and XR-1 Developer Edition.
Using mixed reality
Using the front-facing cameras on your headset, applications can combine virtual and real-world elements to create an immersive experience in mixed reality.
For the best possible image quality, calibrate eye tracking when you start using the headset. The headset will display content in the highest resolution in the area where you are looking.
Use the headset in a well-lit environment to get the optimal performance from your headset cameras.
Mixed reality camera settings
XR-3
You can adjust the mixed reality camera settings to work best with your room environment. Navigate to the Headset tab in Varjo Base to change your settings.
| Mixed reality video brightness | This setting is used to control the brightness of your mixed reality image. If your image is too dark or bright, adjust this setting. |
| Sharpness | This setting is used to adjust the sharpness of the mixed reality video. The amount of visual noise, such as lighting and the number of objects around you, may have effect on the video sharpness.
The scale is from 0 to 14 and the default value is 9. Lower values soften the image making the edges of objects more round. Higher values make the image and the edges of objects sharper by adding contrast and brightness. It is good to try out different values. The best experience may be when the VR content and the mixed reality video match each other, but in the end, this depends on your personal preferences. |
| Flicker compensation | If lights flickering in your room are causing disturbance to your mixed reality experience, you may have an issue with flicker compensation. Depending on your geographical location, the frequency of alternating currents in household electrical outlets may be either 50 Hz (most of Europe, Africa, UK, Southern South America, Australia, Asia) or 60 Hz (North America, Northern South America). If you are experiencing flickering lights, set the flicker compensation accordingly.
Note that adjusting both your exposure and ISO values manually will affect your image brightness. |
| White balance | This setting balances the color temperature of the mixed reality image in relation to the lighting in your room. If your room has strong, fluorescent lighting or ample daylight, your image quality will benefit from a higher setting. If your room has a typical yellow indoor light, use a lower setting. Try values between 3000–3500 K for typical, home indoor light (yellow tone) and 4200–5000 K for white or cool white lights typically used in office environments. |
| Exposure | This setting is used to adjust the amount of light reaching the camera sensor. Higher exposure values will lead to more light but will increase blurring when moving the camera. Low values will increase image noise. |
| ISO | This setting is used to adjust the sensitivity of your camera to light. A high ISO will produce a grainier and brighter image and a low ISO will produce a darker, less grainy image. If the room you are in is well-lit, a lower ISO will provide a better-quality image. Similarly, if the room is dark, a higher ISO value will provide a better-quality image. |
Real-world view
With Real-world view, you can see the physical environment around you through the mixed reality cameras on your headset. You can quickly switch between your application and the real world while wearing the headset.
You can start Real-world view either with the headset buttons or in Varjo Base.
XR-3
To enable or disable Real-world view, navigate to the Tools menu in Varjo Base and select Real-world view. Alternatively, open the Menu and select Real-world view.
For a shortcut, long-press the Menu button  to enable or disable Real-world view.
XR-1 Developer Edition
To enable or disable Real-world view, navigate to the Tools menu in Varjo Base and select Real-world view. Alternatively, open the Menu and select Real-world view.
For a shortcut, long-press the System button to enable or disable Real-world view.
Varjo Markers
Varjo Markers are physical markers tracked by your headset in mixed reality applications. Different types of markers are used for different purposes.
You can find instructions for printing Varjo Markers on our Developer Portal. Each marker has a unique ID, and you should not use the same marker more than once in any given environment.
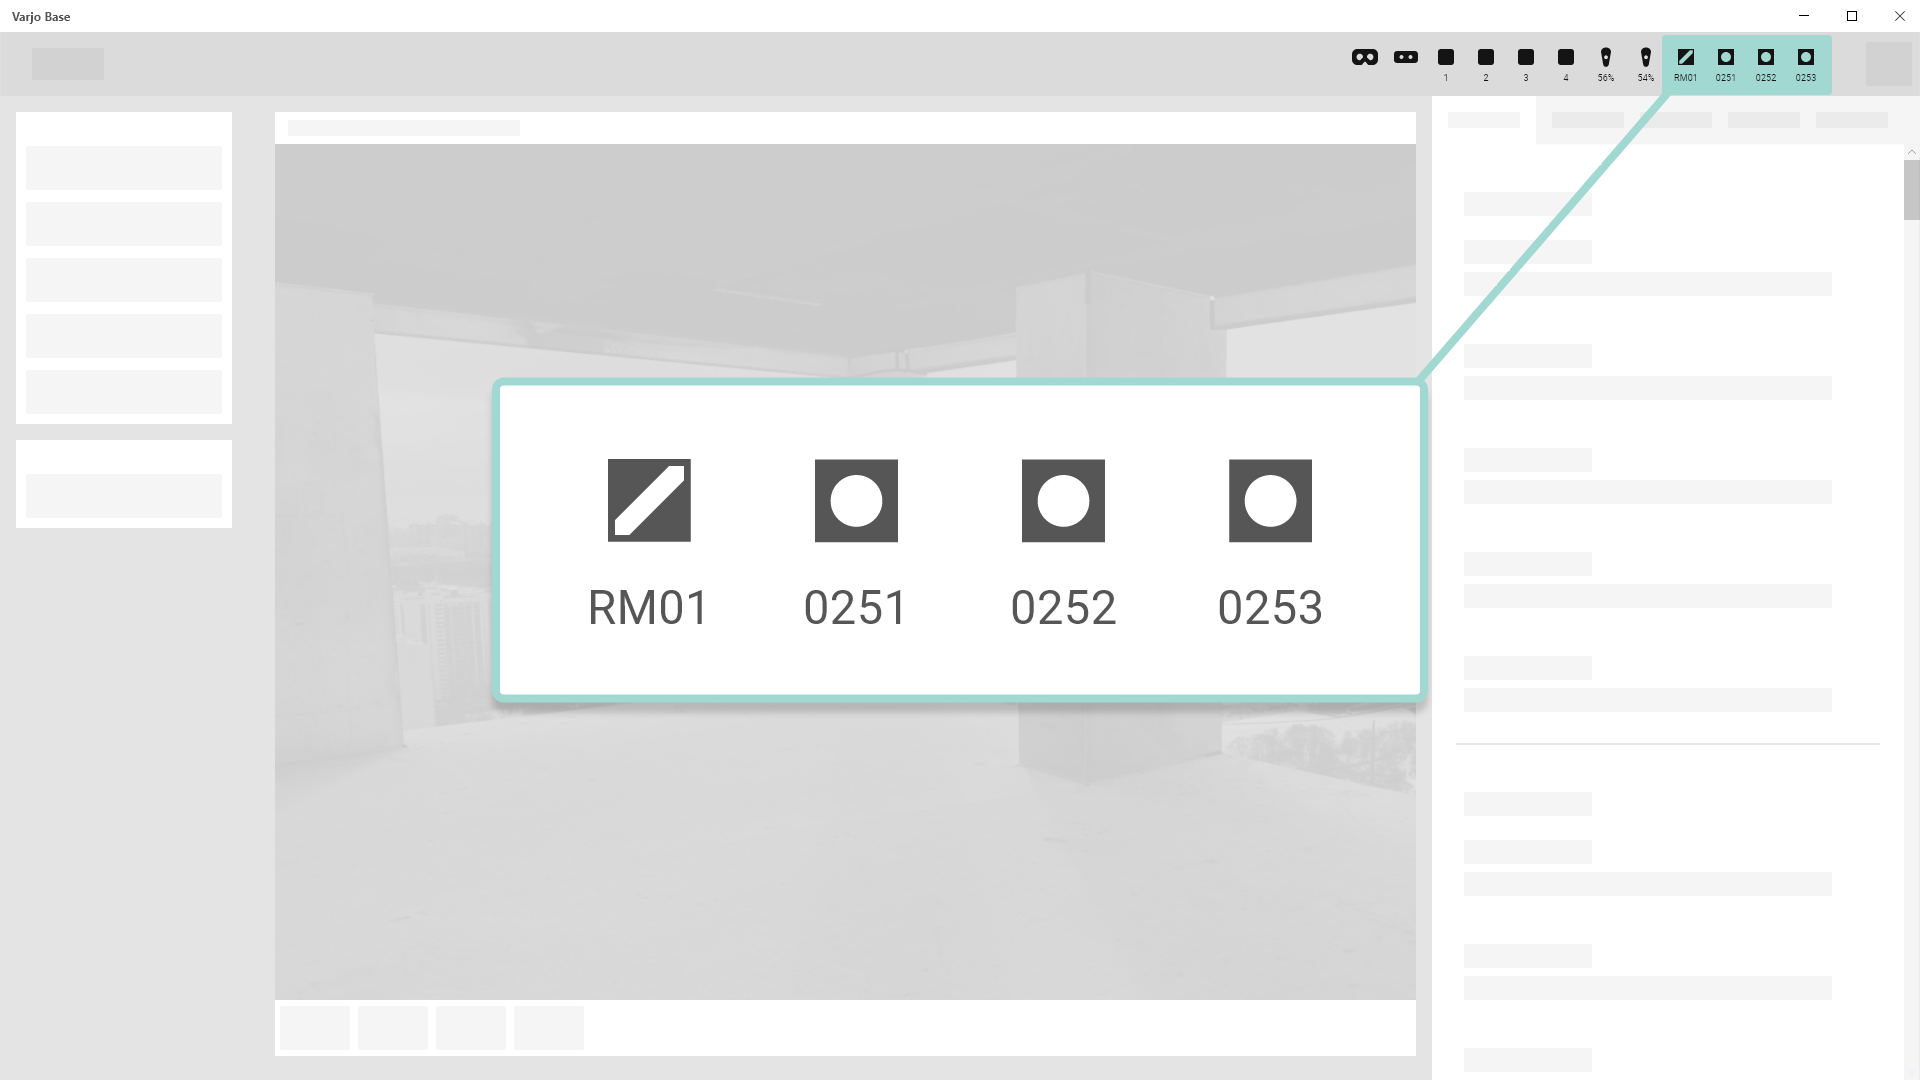
When your application is running, the status area in Varjo Base will show a list of the markers that your headset has recognized. If a larger number of markers are listed, you can see their details by clicking on the status area. Markers that have not been recognized by the headset for longer than two minutes will be automatically cleared from the status area.
Object markers
Object markers are used to track the position of virtual objects in mixed reality. You can print out and place object markers in the physical environment, which are then replaced with virtual content in your application. Object markers can be stationary or moving.
Note that object markers are processed by the headset only if your application supports the use of Varjo Markers.
Reference marker
XR-3
The Varjo reference marker can be used to improve the accuracy of Varjo inside-out tracking.
With Varjo inside-out tracking (Beta), your headset scans the room to keep track of its position. Tracking can be lost if there aren’t enough physical features in the room for the headset cameras to follow. To improve tracking, place the reference marker in the room to serve as an easily trackable physical feature. Tracking accuracy is corrected automatically whenever the cameras on your headset see the reference marker.
Note: make sure that you have good lighting in the room when you use the headset. Read more about how to prepare your environment.

Place the reference marker on a level surface so that the headset cameras can see it when you use the headset, for example on the wall, floor, or table in front of you. Make sure to attach the marker firmly and flush with the surface. The Varjo-supplied reference marker comes with an adhesive backing, and you can also print out a reference marker yourself.
Remember to calibrate Varjo inside-out tracking (Beta) after you place the marker in the room or if you move the marker.
Chroma key
The chroma key feature allows you to control where a viewer sees virtual content in the mixed reality environment. When chroma key is in use, a predefined color in your physical environment is replaced with virtual content.
Preparing your environment for chroma key
Chroma key works best in good, soft lighting. Make sure the chroma key surface is evenly lit and avoid reflective objects in your environment, as the chroma key background can become visible in these places. Try to use neutral-colored lights with identical color temperatures.
Depending on your intended use, we recommend that you choose a chroma key color that is clearly distinct from human skin tones. Green and blue are typically good choices. Chroma keying requires a bright color tone as its target, and therefore black, white, or gray will not work.
Chroma key can be used either as a background for the scene or on smaller individual surfaces. When using a colored canvas as backdrop, make sure not to leave wrinkles, creases, or shadows on the surface. It helps to leave some distance between foreground elements and the background to avoid shadows falling on the canvas. When placing smaller individual elements into the scene, ensure that they are all the same color and lit similarly.
See our Developer portal for more technical information on how to set up your environment for use with chroma key.
Chroma key settings

In Varjo Base, the chroma key feature is found under the System tab. Open Chroma key color to pick and adjust the color used for chroma key. Enable Use chroma key in all applications to force all applications to use chroma key and the mixed reality cameras. Areas in the chroma key color are replaced with application content.
You may see one of the following messages in the System tab:
| Configuration locked by another application. | Another application is using the chroma key configuration. All chroma key settings are disabled. The settings will be released once the application is closed or is no longer using the configuration. |
| Chroma key set by application. Sampling a new color will erase the current chroma key. | Another application has set the current chroma key configuration. Editing the configuration will replace the current one. |
Picking a chroma key color
To pick a chroma key color, navigate to the System tab and open Define chroma key color.
You can preview the current chroma key configuration using the Preview chroma key setting. The chroma key mask is visualized using the color you select in the drop-down list.
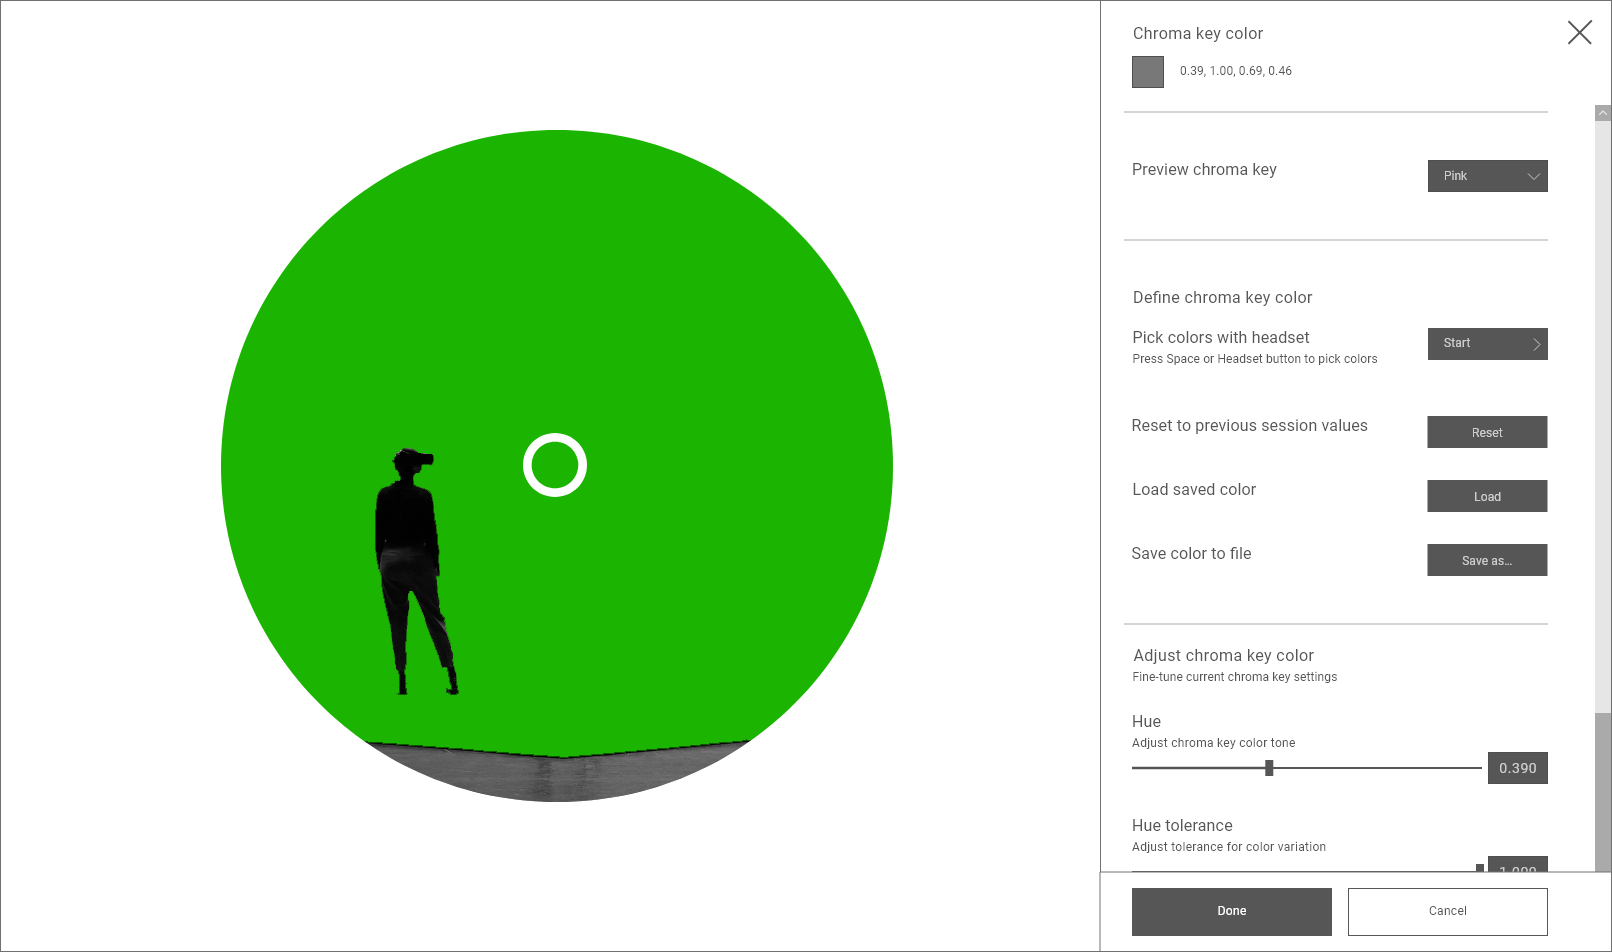
Start Pick colors with headset to select a chroma key color using the mixed reality cameras on your headset. While holding the headset, point it at your target color and use the Space bar or Action button  (or Application button) on your headset to pick color samples. The color you pick is replaced with the preview color in the headset view.
We recommend you pick colors from multiple points in the environment to account for differences in lighting and surface color. The color picker is additive: each selection increases the color range in use. Select Stop to quit the color picker.
Reset will return the original color values. You can also load a color configuration or save the current one.
Your chroma key color can be fine-tuned under Adjust chroma key color. The sliders for Hue and Hue tolerance adjust the chroma key color tone and the tolerance for color variation. Saturation tolerance and Value tolerance adjust the tolerance for bright and dark areas respectively.
Accept the current chroma key color and return to the System tab by clicking Done.
Revert to the previous configuration by selecting Cancel or closing the settings menu.
Mixed reality for OpenVR applications
Some OpenVR applications feature predefined areas inside the application that can be replaced with the video pass-through image from the mixed reality cameras on your headset. Note that the end result may vary depending on the application.
To use mixed reality in OpenVR applications, navigate to the System tab in Varjo Base and enable Mixed reality for OpenVR.
Read more about developing mixed reality applications on our Developer portal.